Birrittellas Pizza Dough is a traditional recipe perfected over 112 years, offering a delicious New York-style pizza experience. Renowned for its simplicity and versatility, it yields a perfectly chewy yet crispy crust, ideal for pizzas, calzones, and other creations, bringing authentic flavor to every dish.
1.1 Background and Tradition
Birrittellas Pizza Dough originates from a rich, 112-year-old tradition, reflecting authentic New York-style pizza heritage. Perfected over generations, it maintains the simplicity and quality of classic Italian methods. Acclaimed pizzaiolos like Nicole Russell have showcased its versatility, while its traditional proofing and stretching techniques ensure a genuine pizza-making experience. This dough embodies the essence of Italian culinary tradition, offering a foundation for timeless dishes like pizza, calzones, and garlic knots, beloved by both home cooks and professional chefs alike.
1.2 Popularity and Reputation
Birrittellas Pizza Dough has gained widespread acclaim as a favorite among pizza enthusiasts and professional chefs. Renowned for its versatility and ease of use, it is often highlighted as the best store-bought pizza dough by culinary experts. Featured in demonstrations by acclaimed pizzaiolos like Nicole Russell, it has become a staple in both home kitchens and professional settings. Its reputation for delivering a perfect crust has made it a top choice for creating authentic New York-style pizzas and other Italian-inspired dishes, further cementing its status as a trusted and beloved product.

Ingredients and Tools Needed
Birrittellas Pizza Dough requires minimal ingredients and tools for preparation. Essential items include flour, yeast, water, salt, and olive oil, while tools like a mixing bowl, rolling pin, and pizza stone or steel are necessary for shaping and baking, ensuring a perfect crust every time.
2.1 Essential Ingredients
The essential ingredients for Birrittellas Pizza Dough include high-quality flour, yeast, warm water, and a touch of salt. These components work together to create a dough that is both durable and flavorful, ensuring a crispy crust with a chewy interior. The simplicity of these ingredients allows the natural flavors to shine, making it versatile for various pizza styles and additional creations like calzones and garlic knots. Proper measurements and freshness of ingredients are crucial for optimal results, maintaining the dough’s signature texture and taste;
2.2 Required Baking Tools
To achieve the best results with Birrittellas Pizza Dough, essential tools include a reliable oven, a pizza stone or steel, and a stand mixer for efficient dough preparation. A dough scraper helps with portioning, while a pizza peel or floured surface aids in shaping. For finishing, a pizza cutter or cutting wheel ensures clean slices. These tools collectively streamline the process, from dough handling to baking, ensuring a crispy crust and perfectly cooked pizza every time.
Preparation Steps
Begin by thawing the dough and allowing it to rest at room temperature for about 2 hours. Preheat the oven to 475°F, ensuring the pizza stone heats up for 20 minutes. Lightly flour the work area and dough to prevent sticking, creating the perfect base for stretching and shaping.
3.1 Thawing the Dough
Thawing Birrittellas Pizza Dough is a crucial initial step. Remove the dough from the freezer and place it in the refrigerator overnight to thaw slowly. For a quicker thaw, leave it at room temperature for about 2-3 hours. Ensure the dough is completely thawed before use to maintain its elasticity and texture. Proper thawing prevents tearing and ensures the dough stretches evenly for a perfect crust. This step sets the foundation for a successful pizza-making experience.
3.2 Allowing the Dough to Rest
After thawing, allow Birrittellas Pizza Dough to rest at room temperature for about 2 hours. This step is essential for the dough to relax, ensuring it becomes pliable and easy to shape. Cover the dough with plastic wrap or a damp towel to prevent drying. Resting helps the gluten relax, making it easier to stretch and form into your desired shape. Proper resting ensures the dough retains its elasticity and texture, leading to a perfectly balanced crust with both chew and crispiness.
3.3 Preheating the Oven
Preheat your oven to 475°F (245°C) for at least 20 minutes before baking. If using a pizza stone or steel, place it inside the oven during preheating to ensure even heat distribution. For an extra crispy crust, some recipes suggest preheating to 500°F (260°C). Proper preheating is essential for achieving a well-cooked crust with the perfect texture. Allow the oven to reach the desired temperature fully before placing the dough inside, ensuring a golden, bubbly crust every time.
Shaping the Dough
Flour the work area and dough to prevent sticking. Gently stretch the dough to your desired shape using light pressure for even thickness and perfect form.
4.1 Flouring the Work Area
Flouring the work area is essential to prevent the dough from sticking. Lightly dust your countertop with all-purpose flour, ensuring even coverage. Gently place the dough on the floured surface, then lightly flour the top of the dough to avoid sticking. Use a gentle pressing motion to spread the dough evenly, ensuring it doesn’t tear. Too much flour can make the dough dry, so use just enough for smooth handling. This step ensures the dough moves freely, allowing for easy shaping and stretching into your desired form.
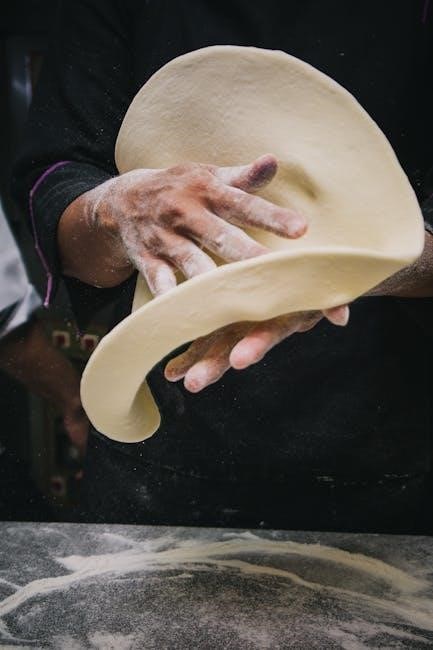
4.2 Stretching Techniques
Once floured, gently lift and rotate the dough, using your fingertips and knuckles to stretch it evenly. Start from the center, pressing outward to create a thin, uniform base. Avoid over-stretching, as this can tear the dough. For a classic shape, rotate the dough in a circular motion, allowing gravity to help stretch it. Ensure the edges are slightly thicker for a crispy crust. Proper stretching techniques ensure a balanced texture and even cooking, essential for achieving that perfect New York-style pizza.
4.3 Achieving the Perfect Shape
After stretching, shape the dough into a circle or rectangle by gently pulling the edges. Place it on a lightly floured peel or pan, ensuring evenness. Rotate the dough to check symmetry and adjust as needed. Use your hands or a rolling pin to refine the shape, ensuring the crust is consistent. Proper shaping ensures even cooking and prevents uneven toppings distribution, enhancing the overall pizza experience with a perfectly formed crust and balanced texture.
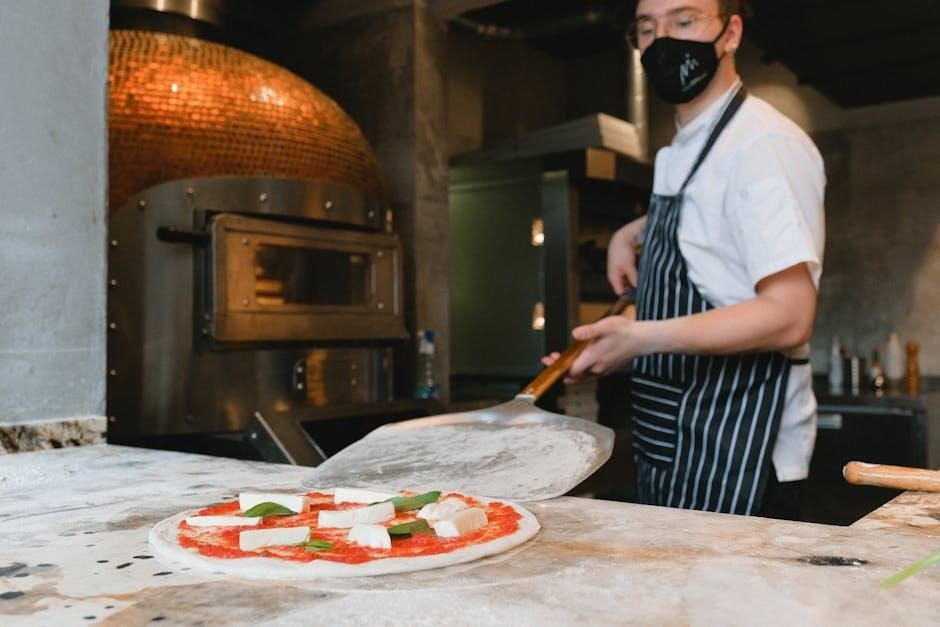
Baking Instructions
Preheat your oven to 475°F. Place the dough on a preheated pizza stone or steel. Bake for 8-10 minutes until the crust is golden and crispy. Ensure even cooking by rotating the pizza halfway through. Monitor the crust to avoid over-browning, achieving a perfectly cooked, flavorful base for your toppings. Proper baking ensures a crispy bottom and a well-cooked, airy crust, essential for a delicious pizza experience.
5.1 Oven Temperature and Stone Preparation
Preheat your oven to 475°F (245°C). If using a pizza stone or steel, place it inside the oven during preheating and let it heat for at least 20 minutes. A hot stone ensures a crispy crust. Lightly dust the stone with cornmeal or flour to prevent sticking. Once the oven and stone are ready, carefully transfer the shaped dough onto the preheated stone. This step is crucial for achieving a well-cooked, crispy crust with a perfectly baked texture. Proper preparation enhances the baking process and final result.
5.2 Baking Time and Crust Appearance
Bake the pizza in a preheated oven at 475°F for 8-12 minutes, or until the crust is golden brown with a crispy bottom and airy texture. Monitor the pizza closely, as oven variations may affect baking time. Rotate the pizza halfway through for even cooking. The crust should have a light golden hue with darker edges, indicating perfect doneness. Avoid overbaking to prevent a tough crust. The ideal crust appearance is crispy on the outside and chewy on the inside, ensuring a delicious texture in every bite.
5.4 Monitoring the Baking Process
Monitor the pizza closely during baking to ensure optimal results. Check the crust after 8-10 minutes; it should be golden brown with a crispy bottom. Rotate the pizza halfway through baking for even cooking. Keep an eye on the cheese, ensuring it melts evenly without burning. If using toppings, adjust baking time based on their cooking requirements. A perfectly baked pizza will have a golden, bubbly crust and a well-cooked base. Avoid overbaking to maintain the dough’s signature chewy texture and flavor.
Creative Applications
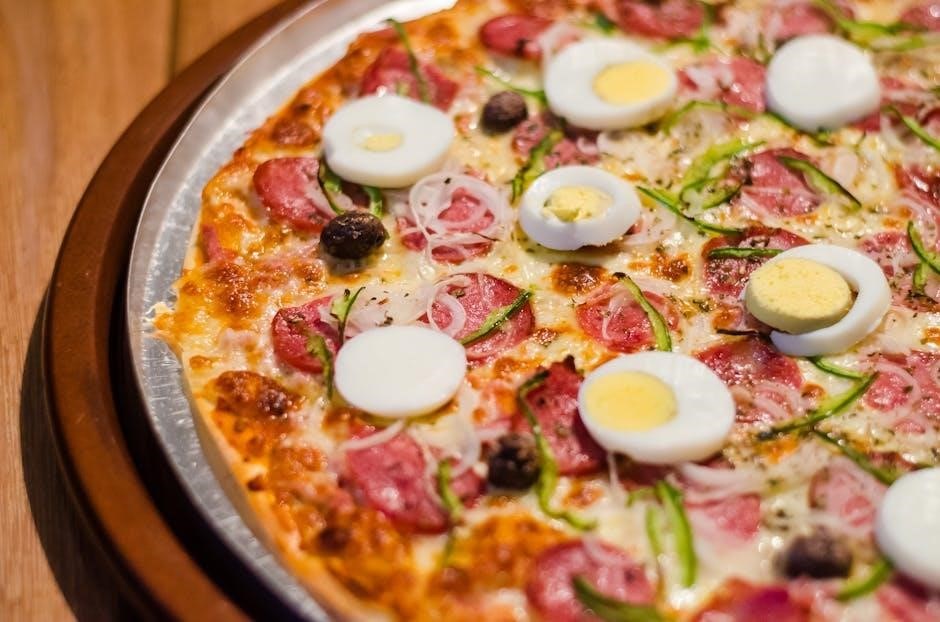
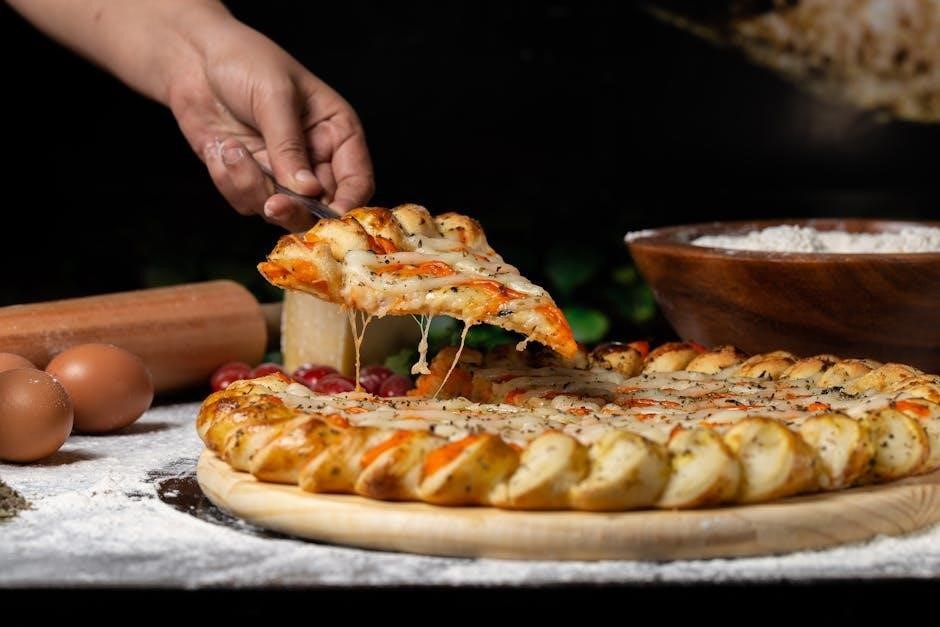
Birrittellas Pizza Dough is versatile for creative dishes beyond pizza, such as breadsticks, garlic knots, and strombolis. It brings flavor and excitement to every application.
6.1 Making Calzones
Transform Birrittellas Pizza Dough into delicious calzones by rolling out the dough and filling it with ingredients like ricotta, mozzarella, and your favorite toppings. Fold the dough over, seal the edges tightly, and bake until golden. Tips include ensuring the dough is at room temperature, using a light dusting of flour, and baking at 475°F for a crispy exterior. Serve with marinara sauce for an authentic Italian treat. This method allows for endless customization, making it a crowd-pleaser for any occasion.
6.2 Creating Garlic Knots
Turn Birrittellas Pizza Dough into garlic knots by portioning the dough into small, equal pieces. Roll each piece into a rope, tie into a knot, and bake at 475°F until golden. Brush with garlic butter and sprinkle with parmesan for a flavorful finish. Serve warm with marinara sauce for a delightful side dish. This simple, crowd-pleasing recipe offers a tasty way to enjoy the dough beyond pizza, perfect for snacks or appetizers. The result is soft, buttery, and aromatic knots with a crispy exterior.
6.3 other Delicious Creations
6.3 Other Delicious Creations
Birrittellas Pizza Dough is incredibly versatile, allowing you to craft a variety of mouthwatering dishes beyond pizza. Use it to make strombolis, quiches, or flatbreads for a quick meal. For a savory treat, create breadsticks by cutting the dough into strips, seasoning with herbs, and baking until golden. You can also experiment with stuffed bread rolls or focaccia, ensuring every creation is bursting with flavor. The dough’s adaptability makes it a staple for any kitchen, offering endless possibilities for delicious meals and snacks. Try it today and explore the full range of culinary delights!
Tips and Tricks
Proof the dough thoroughly and flour generously to avoid sticking. Preheat the oven with a pizza stone for a crispy crust. Monitor baking closely for perfect results.
7.1 Enhancing Flavor
Enhance the flavor of Birrittellas Pizza Dough by incorporating herbs like oregano or garlic into the dough. A light drizzle of olive oil before baking adds a rich, aromatic taste. For an extra burst of flavor, brush the crust with butter or sprinkle with parmesan cheese during the last few minutes of baking. These simple steps elevate the dough, creating a more complex and delicious profile for your pizza creations.
7.2 Handling Sticky Dough
When working with sticky Birrittellas Pizza Dough, generously flour both the work surface and the dough to prevent sticking. Gently brush the dough with olive oil to reduce tackiness. Allow the dough to rest briefly if it remains too sticky, as this helps relax the gluten. Always handle the dough lightly to avoid overworking, which can make it more prone to sticking. Proper flouring and gentle stretching ensure a smooth, manageable dough for shaping into your desired creation.
7.3 Maximizing Dough Potential
To maximize the potential of Birrittellas Pizza Dough, ensure proper storage by keeping it in the fridge for up to 50 days. When using, allow the dough to come to room temperature for easier handling. Generously flour the work surface and dough to prevent sticking. Preheat the oven to the recommended temperature, and if using a pizza stone, let it heat up for 20 minutes. Regularly rotating the dough while baking ensures even cooking. By following these tips, you can achieve a perfectly crispy crust and a flavorful base for pizzas, calzones, and other creations.
Troubleshooting Common Issues
Address tough crusts by adjusting baking time and temperature. Prevent soggy centers by ensuring even distribution of toppings. Monitor oven variations to achieve consistent results.
8.1 Dealing with Tough Crust
A tough crust can occur due to overworking the dough or incorrect oven temperatures. To resolve this, ensure the dough is at room temperature before stretching and preheat the oven to 475°F. Using a pizza stone and proper flouring can also help achieve a tender crust. Avoid overbaking, as this can lead to a hardened texture. Adjusting the baking time and monitoring the crust’s progress will ensure a perfectly cooked, flavorful base for your pizza creations.
8.2 Avoiding Soggy Centers
To prevent a soggy center, ensure the oven is preheated to 475°F for at least 20 minutes, especially if using a pizza stone. Avoid overloading the dough with toppings, as excess moisture can seep into the crust. Properly flour the dough and stretch it evenly to maintain thickness. Bake until the crust is lightly golden and crispy. Monitoring the pizza halfway through baking can help adjust the cooking time, ensuring a dry and flavorful center for a perfectly cooked pizza.
8.3 Adjusting for Oven Variations
Every oven behaves differently, so adjusting temperature and baking time is crucial. Preheat to 475°F, or higher if possible, using a pizza stone or steel for crispiness. Bake for 8-12 minutes, monitoring the crust. If your oven runs cool, increase the temperature slightly. Check the pizza halfway through to ensure even cooking. Rotate it if necessary to prevent hot spots; Adjust baking time based on crust color and crispiness, ensuring a perfectly cooked pizza regardless of oven variations.
Birrittellas Pizza Dough offers a timeless, authentic pizza-making experience, blending tradition with ease. Perfect for home cooks and enthusiasts, it ensures delicious results every time. Experiment and enjoy!
9.1 Final Thoughts
Birrittellas Pizza Dough stands out as a timeless choice for pizza enthusiasts. Its versatility and ease of use make it perfect for crafting delicious pizzas, calzones, and more. The dough’s ability to balance a crispy crust with a chewy interior ensures a satisfying texture every time. With proper handling and baking techniques, it consistently delivers authentic New York-style pizza at home. Whether you’re a novice or an experienced baker, this dough is a reliable companion for creating memorable dishes. Experiment, enjoy, and savor the tradition!
9.2 Encouragement to Experiment
Embrace creativity with Birrittellas Pizza Dough! Don’t be afraid to experiment with unique toppings, seasonings, or cooking techniques. Try crafting calzones, garlic knots, or even breadsticks for a twist. The dough’s versatility allows you to explore a variety of flavors and recipes. Remember, pizza-making is an art, and mistakes often lead to exciting discoveries. Take risks, have fun, and enjoy the process of creating something truly personalized and delicious with every batch of Birrittellas dough.
Additional Resources
Explore featured videos and expert demonstrations for mastering Birrittellas Pizza Dough. Visit official websites and tutorials for additional tips, recipes, and troubleshooting guides to enhance your pizza-making journey.
10.1 Featured Videos
Discover expert techniques with featured videos showcasing Birrittellas Pizza Dough. Nicole Russell and Appetito Editor-in-Chief demonstrate proofing, stretching, and baking. Al Christman shares tips for maximizing dough potential. These videos cover calzones, garlic knots, and more, ensuring a comprehensive guide for all skill levels. Visit the official channel for step-by-step tutorials and creative ideas to elevate your pizza-making skills with Birrittellas Dough.
10.2 Expert Demonstrations
Watch expert pizzaiolo Nicole Russell and Appetito Editor-in-Chief demonstrate Birrittellas Pizza Dough techniques. Nicole, host of Pizza Wars, shares professional methods for proofing, stretching, and baking. Al Christman also provides tips for maximizing dough potential. These demonstrations cover calzones, garlic knots, and more, offering a hands-on learning experience. Gain insights from seasoned experts to master Birrittellas Dough and create authentic, delicious dishes with ease and confidence.