Hard boiled egg makers simplify the cooking process, offering convenience and perfect results every time. They allow for easy, hands-free preparation of eggs to desired doneness without constant monitoring, making them a versatile kitchen tool for various egg dishes beyond just hard-boiled eggs.
1.1 What is a Hard Boiled Egg Maker?
A hard-boiled egg maker is an electric appliance designed to simplify the process of cooking eggs to desired doneness. It uses steam or direct heat to cook eggs consistently, eliminating the need for constant monitoring. These devices often include features like automatic timers, multiple egg trays, and measuring cups for precise water addition. They are ideal for home cooks and professionals, offering a convenient and efficient way to prepare soft-, medium-, or hard-boiled eggs with minimal effort.
1.2 Benefits of Using an Egg Maker
Using an egg maker offers numerous benefits, including convenience, consistency, and time-saving. It eliminates the need for constant monitoring, ensuring perfectly cooked eggs every time. The device allows for precise control over doneness, whether soft-, medium-, or hard-boiled. Additionally, it reduces the risk of overcooking and makes peeling easier. Many models also offer versatility, enabling users to poach eggs or prepare omelettes. Overall, an egg maker enhances cooking efficiency and expands culinary possibilities, making it a valuable addition to any kitchen.

Popular Models of Hard Boiled Egg Makers
Popular models like the Dash Egg Cooker and Elite Gourmet Egg Cooker offer convenient, efficient ways to cook eggs to desired doneness with minimal effort and time.
2.1 Dash Egg Cooker
The Dash Egg Cooker is a compact and user-friendly appliance designed for cooking eggs to various doneness levels. It can prepare up to 12 eggs at once, making it ideal for families or meal prep. The cooker features a built-in timer and automatic shut-off, ensuring perfectly cooked eggs without constant monitoring. Its versatility allows for hard-boiled, soft-boiled, poached eggs, and even omelettes, making it a versatile addition to any kitchen. Cleaning is straightforward, with dishwasher-safe parts available on select models.
2.2 Elite Gourmet Egg Cooker
The Elite Gourmet Egg Cooker is a high-quality appliance designed for effortless egg preparation. It can cook up to 7 eggs at once, offering soft, medium, or hard-boiled results. The cooker uses a steaming method, with a built-in timer and automatic shut-off for precise control. It includes a measuring cup for accurate water levels and a piercing pin to prevent cracking. The compact design and dishwasher-safe parts make maintenance easy. Ideal for home use, it ensures perfectly cooked eggs every time with minimal effort required.
2.3 Key Differences Between Models
The Dash and Elite Gourmet egg cookers differ in capacity and features. The Dash model accommodates up to 6 eggs, while the Elite Gourmet can handle 7. Dash often includes additional accessories like a poaching tray, whereas Elite Gourmet focuses on core functionality. Both use similar steaming technology but vary in timer settings and water measurement guides. Dash tends to be more compact, making it ideal for smaller kitchens, while Elite Gourmet emphasizes durability and ease of cleaning, appealing to frequent users. Each model excels in specific aspects.
Step-by-Step Instructions for Using a Hard Boiled Egg Maker
Plug in the cooker, add water according to desired doneness, pierce eggs if needed, place them upright, set the timer, and let the cooker work. After cooking, cool eggs in ice water for easy peeling.
3.1 Preparing the Egg Maker
Before use, ensure all parts of the egg maker are securely in place; Remove any packaging and wash the components with warm soapy water. Rinse thoroughly and dry. Plug the cooker into an electric outlet, ensuring it’s on a stable surface. Familiarize yourself with the controls and settings. Always follow the manufacturer’s guidelines for initial setup to ensure safe and efficient operation. This preparation ensures optimal performance and longevity of your egg maker.
3.2 Adding Water According to Desired Doneness
To achieve the perfect doneness, fill the measuring cup with cold water to the recommended level for soft-, medium-, or hard-boiled eggs. For most models, soft-boiled eggs require less water, while hard-boiled eggs need more. Pour the water onto the heating plate carefully. Ensure not to exceed the maximum water level to avoid overflow. This step ensures even cooking and prevents under or overcooking, making it crucial for optimal results. Always refer to the provided chart for precise measurements.
3.3 Piercing Eggs (If Recommended)
Piercing eggs is an optional step recommended by some models. Use the piercer on the measuring cup to make a small hole at the larger end. This helps steam distribute evenly and reduces cracking. However, piercing can sometimes cause minor cracks, leading to egg white leakage. If you choose to pierce, ensure the hole faces upward to prevent spillage. This step is not mandatory but can aid in achieving uniformly cooked eggs. Check your model’s guidelines for specific recommendations.
3.4 Placing Eggs in the Cooker
Place the eggs gently into the cooker’s egg tray, ensuring they are secure and not touching the heating plate or each other. For models with multiple trays, arrange eggs evenly for consistent cooking. Pierce-side up if recommended. Avoid overcrowding, especially for soft or medium-boiled eggs, as this can affect cooking uniformity. Follow the manufacturer’s egg capacity guidelines to ensure optimal results. Proper placement ensures even steam circulation and prevents eggs from cracking during cooking. This step is crucial for achieving perfectly cooked eggs every time.
3.5 Setting the Timer
Once the eggs are placed, set the timer according to your desired doneness. Refer to the manual for specific guidelines, as times vary by model. For soft-boiled eggs, 7-10 minutes is typical, while medium-boiled eggs require 9-12 minutes, and hard-boiled eggs need 12-15 minutes. Some cookers have preset settings, while others allow manual adjustment. Start the cooker and let it run. The device will automatically stop once the timer goes off, ensuring your eggs are cooked to perfection. Adjust timing for altitude if necessary.
3.6 Cooking Process
After setting the timer, the egg maker begins the cooking process. It uses steam to heat the eggs evenly. The cooker will automatically turn off once the timer sounds, indicating the eggs are done. Some models may emit a chime or beep when the cycle completes. Allow the eggs to cool in ice water afterward to stop the cooking process. This ensures the eggs are perfectly cooked to your desired doneness. Always refer to your specific model’s instructions for any unique cooking features.
3.7 Cooling Eggs in Ice Water
Once the cooking cycle completes, immediately transfer the eggs to a bowl of ice water to stop the cooking process. This step is crucial for preventing overcooking and ensuring the eggs are easy to peel. Let them sit in the ice water for 10 minutes to cool down thoroughly. After cooling, pat the eggs dry with a paper towel before storing or peeling. This method helps the eggs retain their texture and makes peeling much simpler. Always use cold water for best results.
3.8 Peeling Eggs
After cooling, gently tap the egg on a hard surface to create small cracks. Roll the egg between your hands to loosen the shell further. Start peeling from the larger end, where the air pocket is, as this makes the process easier. For stubborn shells, try peeling under cold running water or using a spoon to gently pry the shell away. The egg maker’s precise cooking ensures the shell separates cleanly, making peeling a breeze. Proper cooling and gentle handling are key to achieving perfectly peeled eggs.
Cooking Times for Different Levels of Doneness
Cooking times vary by model and desired doneness, typically ranging from 5 to 17 minutes. Soft-boiled eggs take 7-10 minutes, medium-boiled 11-13 minutes, and hard-boiled 14-17 minutes. Adjustments may be needed for altitude.
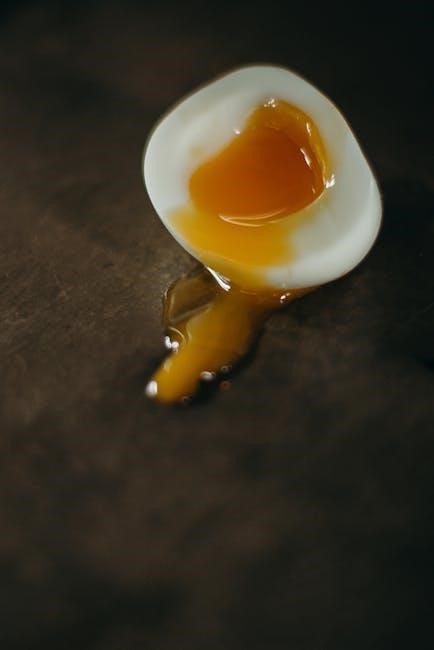
4.1 Soft-Boiled Eggs
Soft-boiled eggs are achieved with shorter cooking times, typically around 7-10 minutes, depending on the model. The yolk remains runny while the white is set. For a precise result, use the measuring cup to add the recommended water level for soft-boiled eggs; Once cooked, immediately transfer eggs to ice water to stop cooking. This method ensures a creamy yolk and a perfectly cooked white, ideal for dipping toast or adding to recipes. Adjust timing slightly for larger batches.
4.2 Medium-Boiled Eggs
Medium-boiled eggs are cooked for 11-12 minutes, resulting in a slightly firmer yolk that still retains some creaminess. The cooking time may vary slightly depending on the egg maker model and the number of eggs. After the timer goes off, transfer the eggs to ice water to stop the cooking process. This ensures the yolks are cooked to a medium consistency, perfect for those who prefer a balance between soft and hard-boiled eggs.
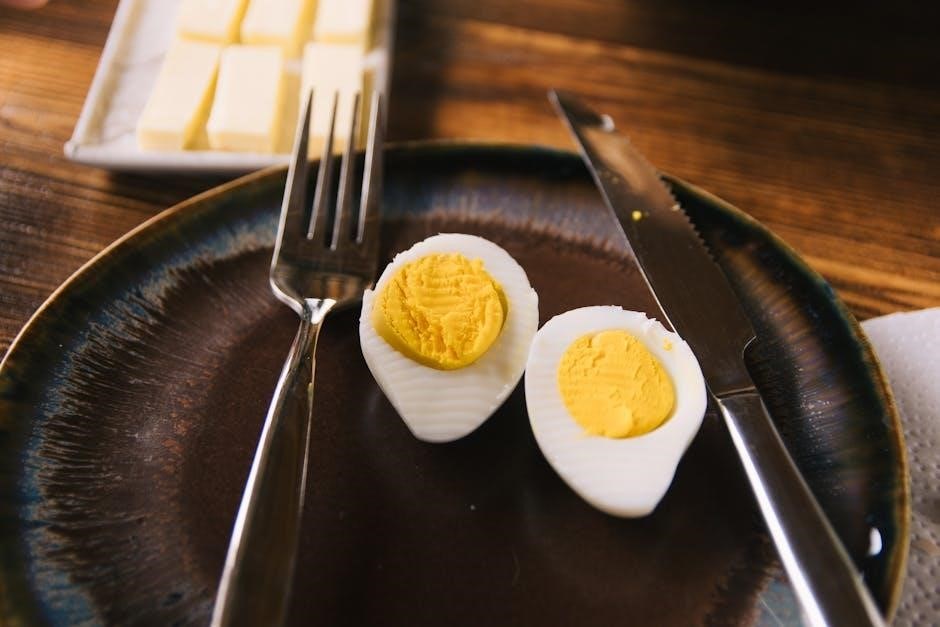
4.3 Hard-Boiled Eggs
Hard-boiled eggs are cooked for 12-15 minutes, resulting in a fully set yolk and white. The egg maker’s timer ensures precise cooking. After cooking, immediately transfer eggs to ice water to cool, making them easier to peel. This method is ideal for snacks, salads, or meal prep. Proper cooling helps prevent the greenish ring around the yolk, ensuring perfectly cooked eggs every time.
Troubleshooting Common Issues
Common issues with egg makers include eggs not cooking properly, sticking to the shell, or being overcooked. Adjusting water levels, monitoring altitude, and proper cooling can resolve these problems.
5.1 Eggs Not Cooking Properly
If your eggs aren’t cooking properly, check the water level and ensure it matches the recommended amount for your desired doneness. Incorrect placement of eggs or insufficient water can prevent even cooking. Additionally, high altitude may require more water to achieve proper cooking. Always refer to your specific egg maker’s manual for guidance, as different models may have unique requirements. Adjusting these factors should resolve the issue and ensure perfectly cooked eggs every time.
5.2 Eggs Sticking to the Shell
Eggs sticking to the shell can be frustrating but are easily preventable. After cooking, immediately transfer eggs to an ice water bath to cool down. This stops the cooking process and helps separate the egg from the shell. Gently tap the egg on a hard surface and peel from the large end, where the air pocket is located. Using older eggs can also reduce sticking, as they tend to have a higher pH, making the membrane easier to separate from the shell.
5.3 Overcooked or Undercooked Eggs
Overcooked or undercooked eggs can occur due to incorrect timing or altitude levels. To avoid this, ensure you follow the manufacturer’s guidelines for water levels and cooking times. If eggs are overcooked, try reducing the timer by one minute next time. For undercooked eggs, increase the cooking time slightly. Always use an ice water bath after cooking to stop the cooking process. Proper cooling helps prevent overcooking and makes peeling easier. Adjusting based on your specific conditions ensures perfectly cooked eggs every time.
Additional Features of Hard Boiled Egg Makers
Beyond hard-boiling, many egg makers offer versatile functionalities like poaching eggs and preparing omelettes, making them a multi-functional kitchen tool for various egg-based dishes.
6.1 Poaching Eggs
Poaching eggs with a hard-boiled egg maker is a breeze. Simply place the eggs in the cooker, add water, and let the device create perfectly cooked poached eggs without the mess. This feature ensures delicate, runny yolks and set whites, ideal for breakfast dishes like eggs Benedict or adding to salads and soups. The process is quick, clean, and requires minimal effort, making it a great option for those who love poached eggs but struggle with traditional methods.
6.2 Making Omelettes
Certain hard-boiled egg makers, like the Dash Egg Cooker, offer the versatility to craft perfect omelettes. Simply whisk eggs, add your preferred fillings such as cheese or vegetables, and pour the mixture into the cooker. The device evenly cooks the omelette, ensuring a fluffy texture without hot spots. This feature is ideal for a quick breakfast or snack, providing a convenient alternative to traditional stovetop methods. It’s a great way to explore beyond boiling eggs and expand your culinary creativity effortlessly.
Safety Precautions
Always handle hot equipment with care to avoid burns. Ensure all parts are securely in place before use, and avoid contact with steam during operation.
7.1 Handling Hot Equipment
Handling hot equipment requires caution to prevent burns. Always use oven mitts or tongs when removing eggs from the cooker. Never touch the heating plate or lid with bare hands, as they become extremely hot during operation. Keep the cooker out of children’s reach to avoid accidental burns. Ensure the unit is placed on a heat-resistant surface and unplugged when not in use. Proper handling ensures safe and efficient cooking.
7.2 Avoiding Steam Burns
Steam burns can occur when handling hot egg makers. Always lift the lid carefully and avoid leaning over the cooker while it’s in use. Use tongs or a spoon to remove eggs, keeping your hands and face away from escaping steam. Ensure the area around the cooker is clear of children and flammable materials. Never touch the cooker’s hot surfaces directly, and unplug it when not in use to prevent accidental burns. Proper precautions ensure a safe cooking experience.
Care and Maintenance
To prevent steam burns, always handle the egg maker with care. Use tongs or a spoon to remove eggs, and avoid leaning over the cooker while it’s in operation. Keep children away and ensure the area is clear of flammable materials. Never touch hot surfaces directly, and always unplug the device when not in use. Proper placement and handling ensure a safe and enjoyable cooking experience.
8.1 Cleaning the Egg Maker
Regular cleaning ensures optimal performance and longevity. Unplug the device and let it cool. Wipe the exterior with a damp cloth and mild soap. For the egg tray and lid, check if they are dishwasher-safe. If not, hand wash with warm soapy water. Rinse thoroughly to remove any residue. Dry all parts with a clean towel before storing. This maintenance routine prevents mineral buildup and ensures your egg maker continues to function effectively.
8.2 Storing the Egg Maker
After cleaning, store the egg maker in a dry place to prevent moisture damage. Ensure all parts, including the egg tray and lid, are completely dry. Avoid stacking heavy items on the device to prevent scratching or damage. If storing for an extended period, consider placing it in its original packaging or a protective cover. Proper storage maintains its condition and ensures it remains ready for future use. Always refer to the manual for specific storage recommendations.
Creative Uses for Hard Boiled Eggs
Hard-boiled eggs are versatile additions to wraps, sandwiches, and breakfast burritos. They can also be used as a protein-packed topping for soups or stir-fries.
9.1 Salad Toppers
Hard-boiled eggs are a fantastic addition to various salads, enhancing both texture and flavor. Slice them thinly and add to green salads, pasta salads, or grain bowls for a protein-rich topping. They also pair wonderfully with avocado, cherry tomatoes, and a light vinaigrette. This simple yet nutritious topping makes any salad more satisfying and filling, perfect for a quick lunch or dinner. Incorporating hard-boiled eggs into your salads is a great way to boost their nutritional value and variety.
9.2 Deviled Eggs
Deviled eggs are a classic party appetizer that can be easily made using hard-boiled eggs from your egg maker. Once the eggs are cooked and peeled, slice them in half lengthwise and carefully remove the yolks. Mash the yolks with your favorite ingredients, such as mayonnaise, mustard, or herbs, and season to taste. Pipe the mixture back into the egg white halves for a delicious and elegant snack. This versatile dish is perfect for gatherings and showcases the convenience of perfectly cooked eggs.
9.3 Egg Salad
Egg salad is a delicious and protein-packed snack or meal that can be made using hard-boiled eggs from your egg maker. Chop the cooled eggs and mix with mayonnaise, mustard, or your favorite seasonings. Add diced vegetables like onions, celery, or herbs for extra flavor and texture. This versatile dish is quick to prepare and perfect for sandwiches, crackers, or as a standalone snack. It’s an excellent way to enjoy the convenience of your egg maker while creating a nutritious and tasty meal.
Storing Hard Boiled Eggs
Store hard-boiled eggs in an airtight container in the refrigerator for up to one week. This ensures freshness and safety, keeping them ready for quick snacks or recipes.
10.1 Refrigeration Tips
To maintain freshness, store hard-boiled eggs in a sealed container in the refrigerator at a consistent temperature below 40°F (4°C). Ensure the container is airtight to prevent moisture and odors from affecting the eggs. Keep them in the coldest part of the fridge, typically the bottom shelf, to prolong shelf life. Avoid washing eggs before storage, as excess moisture can lead to spoilage. Proper refrigeration keeps eggs safe and fresh for up to one week.
10.2 Shelf Life
Hard-boiled eggs stored properly in the refrigerator typically last up to one week. The shelf life depends on storage conditions and handling. Eggs should be kept in their shells and placed in an airtight container to maintain freshness. After peeling, use the eggs immediately, as they deteriorate faster. Always check for any signs of spoilage, such as an off smell or slimy texture, before consumption. Proper storage ensures eggs remain safe and nutritious for a week when refrigerated correctly.
Frequently Asked Questions
Common questions include tips for preventing egg cracking, optimal storage methods, and troubleshooting cooking issues. Users also inquire about compatibility with different egg cooker brands and models.
11.1 Can I Use Different Egg Cooker Brands?
Yes, you can use different egg cooker brands, but ensure compatibility with your specific model. Each brand may have unique features or instructions, so refer to the manufacturer’s guidelines for optimal results; For example, the Dash and Elite Gourmet egg cookers have slight variations in water levels and cooking times. Always follow the provided manual for your particular device to achieve perfectly cooked eggs every time.
11.2 How Do I Prevent Eggs from Cracking?
To prevent eggs from cracking in an egg cooker, ensure they are placed gently in the tray. Piercing the larger end slightly can help release steam, reducing pressure buildup. Avoid overcrowding the cooker, as this may cause eggs to collide and crack. Store eggs at room temperature before cooking, as cold eggs are more prone to cracking when heated. Following these tips will help maintain egg integrity and ensure a smooth cooking process.
Hard boiled egg makers are a game-changer in the kitchen, offering a simple and efficient way to achieve perfectly cooked eggs every time. By following the provided instructions and tips, users can enjoy a variety of egg dishes with minimal effort. Whether you’re making soft-boiled, medium, or hard-boiled eggs, these appliances ensure consistent results. With proper care and maintenance, your egg maker will remain a reliable companion for all your egg-cooking needs, enhancing your culinary experience for years to come.